Showing posts with label JAILBREAK IOS 14. Show all posts

Odysseyra1n Tutorial - Jailbreak iOS 12/13/14 with Checkra1n and Install Sileo - macOS/ Linux guide


In this post, I am going to tell you how to install odysseyra1n on your iPhones or iPads compatible with checkra1n.We are all aware of Checkra1n and it's power. With it's semi-tethered nature it can be a headache sometimes but it is the reason why it is so stable. Checkra1n comes with Cydia installed as the default package manager. Checkra1n team has already announced that with time, they will also add other package managers like Sileo, Zebra and Installer 5 to be installed directly from the Checkra1n app just like Cydia. But checkra1n has also taught us that everything is possible with it!


Odyssera1n is a great tool developed mainly by CoolStar (Developer of Chimera/ Odyssey), which let's you install Sileo as a default package manager while being jailbroken with checkra1n. Libhooker, a substrate/substitute alternative built from the ground up by Coolstar with speed and stability in mind and Procursus, an open source and modern bootstrap that aims to provide a large set of consistently up-to-date tools.

PROCESS:

So, first of all to start with the installation of Odysseyra1n, you will need to be in a complete non-jailbroken mode, means if you are jailbroken with unc0ver, odyssey or even with checkra1n, you will have to restore rootFS! You can remove Odyssey and Unc0ver jailbreak by going in the settings of the respective jailbreaks while in case of checkra1n you will need to be in jailbroken state in order to access the checkra1n application and restore system (restore rootFS).

Once you are done with removing the jailbreak from your device, connect your device to the MacBook/Mac/Linuc PC and then launch checkra1n and jailbreak your device. But once your device turns on in jailbroken mode, you don't have to open Checkra1n and install cydia. Let me write it clearly:

DO NOT OPEN CHECKRA1N LOADER


Moving forward in the video, you will need to keep your device connected to the MacBook/Linux system.

Now, if you are on macOS then you will need to install homebrew first.

To install homebrew, open terminal. Click on the GO button located in the top bar and then click on utilities. Here you will find Terminal app. Open it. Now run these commands:
  • To install homebrew:
/bin/bash -c "$(curl -fsSL https://raw.githubusercontent.com/Homebrew/install/master/install.sh)”
  • Now, to install iproxy, run this command:
brew install usbmuxd


And if you are on Linux, then open terminal. You can right click and choose from the list to open terminal. Now, run the following command to install iproxy for Linux.
sudo apt install libusbmuxd-tools

Now, we have successfully installed iproxy on our MacBook/Linux system.


Now, paste the following command in the terminal application to launch the script and install Sileo on the iPhone.


/bin/bash -c "$(curl -fsSL https://raw.githubusercontent.com/coolstar/Odyssey-bootstrap/master/procursus-deploy-linux-macos.sh)"


Now, terminal might ask you to enter the root password several times, you will have to enter alpine which is the default root password if you have never changed it.

Once it is finished, you will see Sileo on your homescreen.
Now, you can disconnect your device from the MacBook/Linux System.


Now, you can do 2 things.
  • Open Sileo, do all the updates. Then restart your device manually and then rejailbreak.
OR
  • Install NewTerm or any terminal tweak from Sileo, then run these commands: 
  1. su
  2. alpine (you have to enter the root password here)
  3. /etc/rc.d/libhooker (To start libhooker)
  4. sbreload (To restart springboard)

Once you are done with all these steps, you can start using your favourite Sileo tweaks!


If you wanna check out the video tutorial, then you can find it below:

(The video used below is from my own channel and my channel has embedding enabled)


FutureRestore iOS 14 - Downgrade to unsigned iOS 14 versions in 2021!

Hey guys hope you all are doing great, this is iMAT back with another post. In this post we are going to talk about futurerestore iOS 14/15. As you all know that I previously had a tutorial on futurerestore but as you know iOS 14/15 broke a lot of things, one of them was futurerestore. So, today I'm gonna be telling you about using the new and updated futurerestore for iOS 14, thanks to Cryptiiiic (@Cryptiiiic)

Futurerestore now supports iOS 14/15. It doesn't support all devices fully, but it can do the job we want it to do!

For updates, you can follow me on Twitter: @iMAT_YouTube

And keep in mind, jailbreak is compulsory because you need to set the nonce generator value. NON JAILBROKEN METHOD IS ONLY POSSIBLE FOR iPhone X and Belown

SCROLL DOWN TO THE BOTTOM TO GET THE DOWNLOAD LINKS DIRECTLY


Steps:

  • Take a backup of your device using iTunes, iCloud or any 3rd-Party service you prefer because this process will completely erase your data.
  • After that go to settings and Turn Off Find My iPhone and sign out of your iTunes/iCloud account.
  • Now, we need to get the files ready.

  • First of all go to the Nightly.link to download Futurerestore..
  • Here scroll down and click on the link given to get the Latest Compiled Version.
  • Here download the latest compiled version e.g in my case, as of today, it is futurerestore-v194.
  • Now we need to download the IPSW file of the version we are restoring to.
  • For that, go to IPSW.me.
  • Now select on your device type i.e in my case it's an iPhone.
  • After that select your device model i.e in my case it's an iPhone X (GSM)
  • If you are not sure about your device's model. then click on the Identify My Device button located at the top bar. And then on your iPhone, go to Settings >> General >> About and then click on Model Number to reveal your model number e.g for iPhone X (GSM) it is A1901. Now enter it in the tab on "Identify My Device" page.
  • Now download the IPSW file of the version you are restoring to e.g in my case it is iOS 14.3 (18C66).

  • Now you need to get your blobs file. It is the most important thing in this tutorial.
  • To save your blobs, you have to go to TSSSaver and enter your ECID. It saves the blobs of the versions which are signed at that moment.
  • If you have been following me on Twitter (@iMAT_YouTube), you know I keep updating about these things, which means you surely have the blobs of the previous unsigned versions.
  • Keep in mind you can not save the blobs of the versions which are unsigned.

  • So, to save the blobs connect your device to the Mac.
  • If you are on Mojave or lower, launch iTunes and click on your iPhone's icon.
  • Now click twice on Serial Number to reveal the ECID.
  • If you are on Catalina or Higher, then read this to find your ECID value: Find ECID of iPhone on MacOs
  • Now copy it. Then go to TSSSaver again and paste it in the ECID section.
  • Select your device, which in my case is an iPhone X (GSM) (iPhone10,6).
  • If you are using A12 or higher, you will also need to specify APNONCE.

  • Now we have all of the files ready,
FutureRestore v184 - iOS 14.x IPSW - iOS 14.x. blobs

  • Now let's start the process.
  • Go to Launchpad >> Utilities >> Terminal.
  • Open Terminal on your Mac or MacBook.
  • Now the FutureRestore-v194 file would be in .zip file. Unzip it.
  • Now drag it on to Terminal.
  • Now write -t and then drag your blobs file on to the Terminal.
  • Now write --latest-sep --latest-baseband .
  • And if you have a device with no sim, then write --latest-baseband --no-baseband.
  • Now drag the IPSW file of the version you are restoring to.
  • It would look something like this if you are restoring to iOS 14.3:
futurerestore -t blobs.shsh2 --latest-sep --latest-baseband iOS14.3.ipsw

  • Now press enter.
  • And after 10-15 minutes your device will be restored to iOS 14.x.
  • Now you can restore your backup taken on the previous iOS version.
  • You can watch this video if you get an error that your iPhone's version is too old for the backup.

  • That's it!! Enjoy your device on downgraded version!

LINKS:

If it helps, then please go ahead and hit the thumbs up button on my YouTube Tutorial and also Subscribe to my YouTube Channel.

Also, Follow me on Twitter, Telegram and Instagram.


Jailbreak iPhone/ iPad using an Android Device


CheckRa1n is the latest semi-tethered JAILBREAK. CheckRa1n is compatible with all the devices with chip A7 to A11. It includes all iPhones from iPhone 5s to iPhone X, including the iPhone SE 1st Generation.

CheckRa1n is compatible with all iOS versions released after iOS 12.0.

If you are a jailbreak lover then remember to stay on as lower iOS version as possible, but with checkra1n, you dont even have to worry about that.

There are a lot of methods to use Checkra1n. 
In today’s post we are covering the topic of using CheckRa1n on an android device.

As we know that in February Checkra1n for linux was released. And as we also know that android is built using Linux as the base, so there might be a way of using an android device to Jailbreak your iPhone using Checkra1n. That is what we are going to talk about today.

Requirements:

First of all if you want to know how to Root your android device then click here. 
Follow this to install Magisk.

Now let’s start the process.

STEP 1

CHECK THE CPU ARCHITECTURE:

First of all you will need to check which CPU architecture is your Android Device using.

Click here to check which CPU architecture are you using.

CPU architecture determines which checkra1n file you will have to download. 

ARM? ARM64? Or other. 

STEP 2
DOWNLOAD CHECKRA1N FILE:

Once you have checked the CPU ARCHITECTURE of your Android Device, Go Ahead and download the CheckRa1n file.

CheckRa1n v10.2.0 - DOWNLOAD 

STEP 3
Download Termux

In this step, open Google Play Store on your Android device. Search Termux and install it.

Or Click on this link to open the app directly:


STEP 4
Download fx file explorer

We will need to have a file explorer to access the Android files with root access. We will need this to transfer the Checkra1n file we downloaded in the Step 2. It is required to transfer so that Termux can locate the Checkra1n file when we will send the command to Jailbreak.

Now go ahead and download Fx File Explorer from the link given below:


STEP 5
TRANSFERING THE FILE

in this step we will transfer the checkra1n binary file to the specific folder so that Termux can locate it.

Once you have installed Fx File Explorer, open it and set it up. Set it up as a free version as Pro version is not required for this process.

Once you are done with setting it up, enable root permissions to move the checkra1n file into the system partition to use it in termux.

Just follow the steps:
  • Open Fx File Explorer
  • On main home screen, tap the menu icon located at the top left.
  • Go to settings
  • Scroll down untill you see the Developer Root option.
  • Select it. A new warning screen will appear.
  • Check the I Understand The Risk box and then OK to confirm.
  • Tap the back arrow to return.
  • Now go to the folder where your checkra1n file is downloaded. Most probably it will be in DOWNLOAD folder. Long press on it and then select Copy option from the top.
Now tap the back arrow key to go all the way back to the main home screen. Then go to the SYSTEM ROOT section. It will ask for authorization so click OK and then Grant Superuser permission.

Now tap the three dot vertical menu located at the top right corner. Select GO TO PATH. And paste this location:
/data/data/com.termux/files/homeNow tap on Clipboard option from upper right and click paste to transfer the Checkra1n file here.

Now, you can close Fx File Explorer and move to the next step.

STEP 6
GRANT SU PERMISSIONS:

Now open Termux, and type the following command

su

Aftet that you will be prompted to Grant the super user permission. Click on Grant.

STEP 7
PUT IPHONE INTO DFU MODE.

You have to know the difference between recovery mode and dfu mode for this step. In recovery mode, you will see a screen with a wire and a laptop screen (iTunes logo for older versions), while in DFU mode the screen is all black! there will be a blank screen.


STEP 8
CONNECT YOUR IPHONE TO ANDROID

Now make sure that your device is in DFU mode, then:

Connect OTG adapter to the Android device and connect your iPhone to the android device using a lightning cable.

STEP 9
GET READY TO RUN CHECKRA1N ON TERMINAL

Open termux on your Android device, make sure you have granted SuperUser permissions to it from the Step 6.

Now type the following command:

lsusb

That command will check to make sure your iPhone and Android device are properly communicating with one another. If they are successfully connected, you should see the USB ID of "05ac:1227". If the device ID matches, then you're ready to execute the jailbreak command in the next step. If not, you might have to repeat the previous two steps and try again

If your device is connected properly, then its time to make the checkra1n file executable.

Type or paste the following command to make the Checkra1n file executable.

chmod +x checkra1n

this command will make our Checkra1n Binary File executable.

STEP 10
RUN CHECKRA1N

Now that everything is done:

iphone is in DFU mode.

Checkra1n file is ecexutable

iPhone is connected to the Android Device.

So, now its time to run checkra1n. So run the following command to execute the checkra1n file.

./checkra1n -c

After that you device will turn on, first you will see the Apple Logo and then you will see the verbose screen and after that your device will turn on in jailbroken mode.

STEP 10
INSTALL CYDIA


Now the final step in to install Cydia. After your device turns on, follow the steps mentioned below to install Cydia.
  • Enter your Passcode.
  • After that swipe between the home pages and you will see checkra1n icon on your home screen.
  • Make sure you are connected to internet.
  • Open Chekra1n.
  • Tap on Cydia.
  • Tap on Install Cydia.
  • After that it will Download the base system.
  • Then it will download and install Cydia.
  • After that tap on the cydia icon on your homescreen to open Cydia and start installing tweaks.

Guys I really hope that you found this tutorial useful. Find me on other platforms and help me in growing so I can post more content like this:


BootRa1n

Jailbreak iOS 13? Checkra1n!

So todays post is about BootRa1n, which is an ISO file with enough Linux to run checkra1n on a windows PC/ Laptop. BootRa1n lets you use the latest versions of checkra1n to jailbreak your iDevice. 


CHECKRAIN has the power to even jailbreak the latest iOS 14 beta, but that vesion of checkra1n is not released publicly yet! 

Before we continue further, check whether you can jailbreak using checkra1n by heading over to the CAN I JAILBREAK? page by CLICKING HERE.

Here, you will be able to check whether you can jailbreak using checkra1n or not! and if your device us not compatible with checkra1n, then whether you can jailbreak using any other jailbreak or not!

What is special about BootRa1n? It supports:
  • AMD
  • INTEL
  • 32-bit
  • 64-bit
So it will support almost every Laptop/PC.


So if your device is compatible with checkra1n, then you will need to download a few files:

Once you have download the files, make a bootable flashdrive using Balena Etcher and boot into it.
you might see some options go for GUI one or any of them.
Then enter the login details:
login id: anon
password: voidlinux

After that you will boot into Checkra1n by running this command: sudo checkra1n

Then, connect your device and click on the start button and follow the on-screen instructions to Jailbreak your device.

You can also check out my Video Tutorial on my channel:

(The video used below is from my own channel and my channel has embedding enabled)


Checkn1x V1.1.7 Latest ISO file for Checkra1n on Windows - Jailbreak any iOS version from iOS 12.0 to the latest version of iOS 14. Jailbreak iOS 12.5.4/13.7/14.7.1

Jailbreak iOS 12/13/14? Checkra1n is the best option!

So todays post is about checkn1x, which is only a ~30 MB ISO file to use checkra1n on a windows PC/ Laptop. Checkn1x lets you use the latest versions of checkra1n to jailbreak your iDevice. 


CHECKRAIN has the power to even jailbreak the latest iOS 14 and iOS 14 betas, but that version of checkra1n is only available for A10(x) and below as of now. And support for A11 is limited and requires disabling passcode and Face ID!

Before we continue further, check whether you can jailbreak using checkra1n by heading over to the CAN I JAILBREAK? page by CLICKING HERE.


Here, you will be able to check whether you can jailbreak using checkra1n or not! and if your device is not compatible with checkra1n, then whether you can jailbreak using any other jailbreak or not!

So if your device is compatible with checkra1n, then you will need to download a few files:


Once you have download the files, make a bootable flashdrive using Balena Etcher and boot into it to run Checkra1n and jailbreak your device!

You can also check out my Video Tutorial on my channel:


Follow me on Twitter @iMAT_YouTube and YouTube for more updates!

Translate

Google Search Console

You may also like:

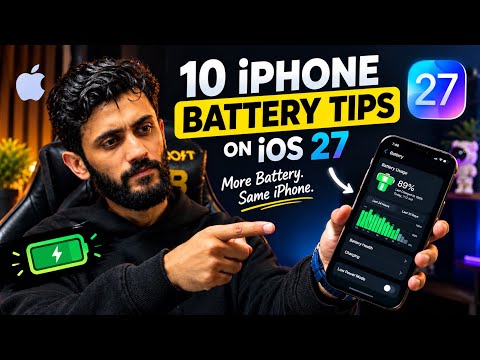
How to Improve iPhone Battery Life on iOS 27 Without Losing Performance

Is your iPhone battery draining faster than expected after updating to iOS 27? You do not necessarily need to sacrifice smooth animatio...

Popular Posts