Showing posts with label checkra1n. Show all posts

Checkra1n Windows Method RELEASED - How Jailbreak iOS 12.0 to iOS 14.8.1!


Hey whats up guys, in todays post I'm going to show you how to install Checkra1n on Windows and without a bootable flash drive. Previously, If you wanted to use Checkra1n on windows, you either needed to install:

All of them were really complicated, and even in the easiest method you needed to create a bootable flashdrive and restart your PC/laptop and boot into it in order to use it. But now it's as easy as running any other app on your Windows system. Thanks to the iRemoval Team for the great work. Make sure to follow them on Telegram:


Compatible Devices:

Checkra1n supports all iDevices with A7-A11 chip including all iPhones, iPads and iPods.

But currently A8/A9/A10/A10X/A11 are supported on Checkra1n Windows, and support for A7/A8X/A9X/T2 will be added soon!

Supported iPhones are given below:

  • iPhone 6
  • iPhone 6 Plus
  • iPhone 6s
  • iPhone 6s Plus
  • iPhone SE (1st Generation)
  • iPhone 7
  • iPhone 7 Plus
  • iPhone 8
  • iPhone 8 Plus
  • iPhone X
WILL BE ADDED SOON: iPhone 5s

Compatible Windows versions:

Currently, Checkra1n for Windows only supports Windows 8 & Windows 10. I will update as soon as support for other versions of Windows is added.

So, lets start the process!


Process:

  • Open Browser.
  • Go to the link given below to go to the Checkra1n Windows Download Page (iRemoval Pro):


  • Once you have downloaded Checkra1n Windows (iRemoval Pro), then you need to download the only thing required other than this, iTunes. Go to Windows Softwares page on my Website to download iTunes for your 32-bit or 64-bit Windows:


  • Run the iTunes setup file and install iTunes. Your PC/Laptop will need to restart after it finished installing iTunes. Restart it!
  • When your PC/Laptop turns back on. Extract the iRemoval Pro application you downloaded earlier.
You might need to turn off anti virus on your Windows PC/Laptop in order to access the application which means this file might contain virus and might harm your personal data. I am not responsible for any harm caused, if you're going for this process then you're doing this at your own risk!
  • The iRemoval Pro application will open:

  • In the tabs located at the left, Click the JAILBREAK Button!
  • Checkra1n Application will open!

  • After that connect your iPhone running iOS 14.8.1 or lower, remember iOS 15 is not supported at the moment.
  • If you see the error -21, then make sure your device is unlocked and you have trusted your PC/Laptop.
  • Now disconnect your iDevice from the PC/Laptop and connect it again!
  • Once you have connected your iPhone, if you are on a higher iOS 14 version and you see that it is not supported at the moment, then click on OPTIONS located at right bottom beside the Start button.
  • Allow the untested iOS/iPadOS/tvOS versions:
  • Then click on the START button.
  • Then clicking NEXT will take your device to RECOVERY MODE.
  • After that, Checkra1n will guide you through the process to put your iDevice in DFU mode depending on the device you're using.
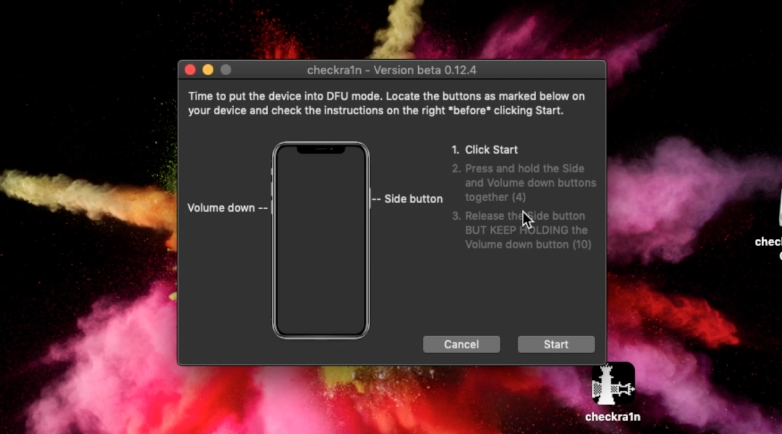
  • Once it finishes, you will get the All Done dialogue, after that you can disconnect your iDevice from the PC/Laptop.
  • After that unlock your iDevice and you will see the Checkra1n Icon on the home screen.
  • Open it, and click on Install Cydia. (You need to be connected to Internet for that.)
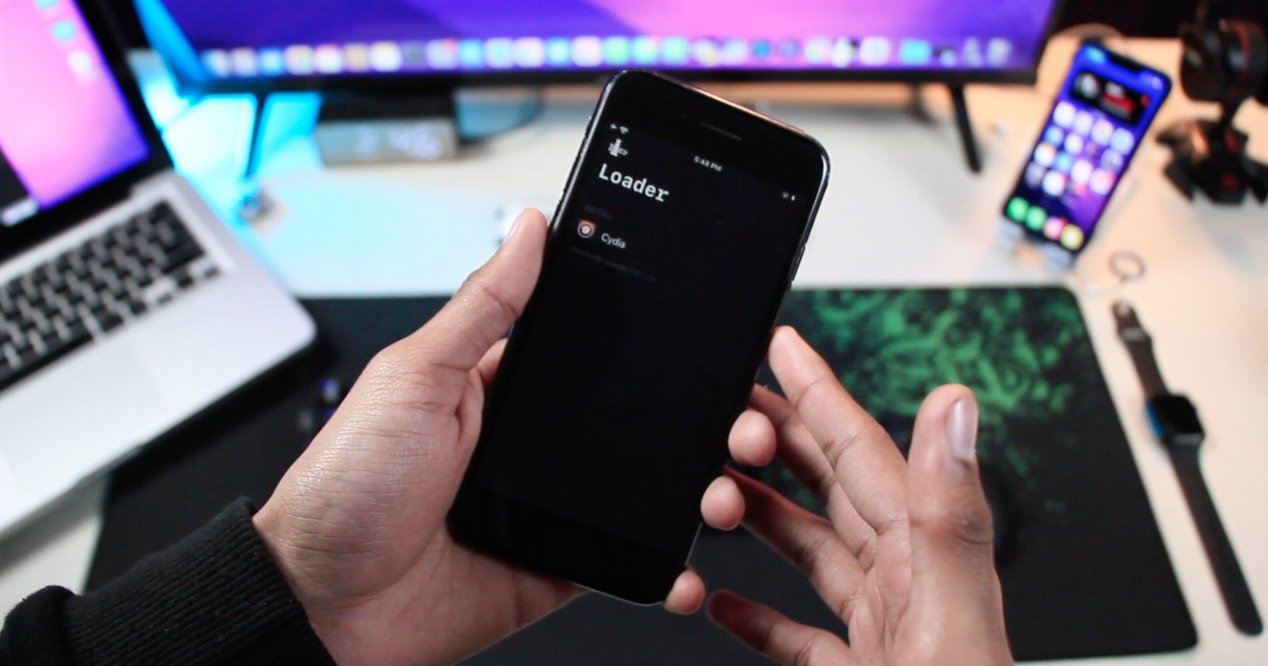
  • After that it will Download base system, Download Cydia and then Install Cydia.
  • Then it will take you to your home screen where you will see the Cydia Icon!
  • Open the Cydia app to start installing your favourite Cydia Tweaks!
  • Go to this link to install some great Cydia sources: CLICK HERE
  • All Done.

Watch the video below on how to install Checkra1n on your Windows PC/Laptop and Jailbreak your device successfully:


If you have any questions or you face any error, then you can reach me out on Twitter:


Also, follow me on my socials:

Set NONCE GENERATOR VALUE without Jailbreak - Checkm8 compatible devices!

    In this video, I am going to show you how to set nonce generator value on checkm8 compatible devices without jailbreak. There are a lot of nonce setters available before but all of them require you to be jailbroken, but if your device is compatible with the checkm8 bootrom exploit then it won't be necessary for you! Watch the video to successfully set the nonce value!


Once you have successfully set the nonce generator value, you can use futurerestore tutorials from my YouTube channel to restore your device to an unsigned iOS version. (remember that sep compatibility matters)

Below I have shared my futurerestrore tutorials, you can use whichever one you like. In futurerestore CLI, you will perform the tasks on command prompt or terminal depending on the OS you're using. If you are not good at CLI, you can use Fututerestore GUI, which is an app based on the Futurerestore tool.

Futurerestore CLI Tool:


FutureRestore GUI Tutorial:


If you have any questions or you face any error, then you can reach me out on Twitter:


Also, follow me on my socials:


Checkm8 Compatible Devices List

 In this post I am going to list the devices which are compatible with Checkm8 Bootroom Exploit! Checkm8 is compatible with A5 to A11 devices! I have listed all of the devices so it is easier for you to check if your device is compatible with the exploit or not!


Compatible Devices:

A5/A5X

iPhone 4s

iPad 2

iPad Mini (1st Gen)

iPad (3rd Gen)


A6/A6X

iPhone 5

iPhone 5C

iPad (4th Gen)


A7

iPhone 5s

iPad Air

iPad Mini 2

IPad Mini 3


A8/A8X

iPhone 6

iPhone 6 Plus

iPad Mini 4

iPad Air 2


A9/A9X

iPhone 6s

iPhone 6s Plus

iPhone SE (1st Generation)

iPad (2017) 5th Gen

iPad Pro (12.9 inch) 1st Gen

iPad Pro (9.7 inch)


A10/A10X

iPhone 7

iPhone 7 Plus

iPad (2018, 6th Gen)

iPad (2019, 7th Gen)

iPad Pro 10.5" (2017)

iPad Pro 12.9" 2nd Gen (2017)


A11

iPhone 8

iPhone 8 Plus

iPhone X


Apple TV 3rd Generation

Apple TV 4

Apple TV 4K

iPod touch 5th Gen

iPod touch 6th Gen

iPod touch 7th Gen

Apple Watch Series 1/2/3


ODYSSEYN1X for Windows - Jailbreak iOS 12/13/14 - Install Odysseyra1n, Linux & Android on iPhone/iPad

In this post, we are going to install Checkra1n/Odysseyra1n/Project Sancastle on our iPhone but without MacOs. As we all know Odysseyra1n can not be installed directly on iPhone on a Windows PC/Laptop, but using a bootable flash-drive, it is possible now to install it on Windows!

We are all aware of Checkra1n and it's power. With it's semi-tethered nature it can be a headache sometimes but it is the reason why it is so stable. Checkra1n comes with Cydia installed as the default package manager. Checkra1n team has already announced that with time, they will also add other package managers like Sileo, Zebra and Installer 5 to be installed directly from the Checkra1n app just like Cydia. But checkra1n has also taught us that everything is possible with it!


Odyssera1n is a great tool developed mainly by CoolStar (Developer of Chimera/ Odyssey), which let's you install Sileo as a default package manager while being jailbroken with checka1n, libhooker, a substrate/substitute alternative built from the ground up by Coolstar with speed and stability in mind and Procursus, an open source and modern bootstrap that aims to provide a large set of consistently up-to-date tools.


  • WHAT IS ODYSSEYN1X?

ODYSSEYN1X is a linux-based distro, which can be used on a Windows Laptop or a PC, and after that you can use it to install Checkra1n, Odysseyra1n and Project Sandcastle.

  • WHAT IS PROJECT SANDCASTLE?

PROJECT SANDCASTLE was introduced in the checkra1n's new versions, which lets you boot Android and Linux on your iPhone/ iPad. Important thing to remember is that it is still in beta so not everything is fully supported. You can read more about it at: Project Sandcastle

  • HOW DO INSTALL ODYSSEYN1X AND RUN IT ON WINDOWS?

For that first of all you will have to create a bootable flash-drive and boot into it. Just follow the steps mentioned below:
  • Download Odysseyn1x ISO file.
  • Download Balena Etcher and then Install it.
  • Connect your USB Flash-drive.
  • Open Balena Etcher.
  • Balena Etcher Will automatically detect your USB Flash-drive. If you have multiple flash-drive connected then click on Select and choose the one from the list you want to install Odysseyn1x on.
  • Keep in mind it will wipe all of your data on the flash-drive, so make sure you have a backup of it.
  • Click on Select Image and navigate to the folder where the downloaded Odysseyn1x ISO file is placed and Select it.
  • After that click on flash and you bootable drive will be ready in just a few seconds.
  • After that restart your Pc or Laptop and boot into BIOS.
  • After that select your usb flash-drive from the list and boot into it.
  • You will see the Odyssen1x menu on the next screen!
  • It will look like this:

Now let's move to the next step on installing:
  • Checkra1n
  • Odysseyra1n
  • Project Sancastle

Installing Checkra1n:

First step of this whole process is to install Checkra1n.
  • Open Checkra1n
  • Connect your device in Normal Mode.
  • Click Start and then Next to put the device in Recovery Mode.
  • Then follow the on-screen instructions provided by Checkra1n to put the device in DFU mode.
  • When the device is in DFU mode it will automatically get detected by Checkra1n and it will boot your device in Jailbroken mode.
  • When your device turns on, Checkra1n Loader will be on your home-screen.
  • Do not open it if you want to install Odysseyra1n!

Installing Odysseyra1n:

Now to install Odysseyra1n on your checkra1ned device, as I mentioned you do not have to open the checkra1n loader. After that you will have to select the Odysseyra1n option on Odysseyn1x screen to install Odysseyra1n.

And, another thing to keep in mind, you dont have to install Odysseyra1n after every shut-down or reboot. You will just have to re-jailbreak using Checkra1n.

Installing Project Sandcastle:

Now using the Project Sandcastle, you can boot into Android and Linux on your Checkra1ned device.

To Install Android:
  • Select Project Sandcastle from the odysseyn1x screen.
  • Then select Setup Project Sandcastle and then select Start Android.
  • After that wait for Project Sandcastle to set up.
  • Once Project Sandcastle finishes installing, just select Start Android to boot back into Android on your checkra1ned device.

How do I remove Android?

If you want to remove the Android NAND image and reclaim the space:
  • Install NewTerm from Sileo or Cydia.
  • Then open it from your Home-Screen.
  • Now you will have to mount the volume and remove the Android NAND image.
  • First of all run this command and find the last volume:
ls /dev/disk0s1s*
  • To Verify if it is the right volume, run the command given below:
/System/Library/Filesystems/apfs.fs/apfs.util -p VOLUME_HERE
  • If it says Android, then it is the right one.
  • Now you have the volume path, now let's run the remaining commands and finish android from your device forever.
  • Write  su  to run the terminal as root and then enter the root password. If you haven't changed it, then its  alpine  by default.
  • Now run the following commands one by one:
mkdir -p /tmp/mnt
mount -t apfs VOLUME_HERE /tmp/mnt
rm -rf /tmp/mnt/nand
umount /tmp/mnt
sync

DONE! you have successfully reclaimed the space.

To Boot Linux:

To boot linux:
    • Select Project Sandcastle from the Odysseyn1x screen.
    • Choose Start Linux.
    Done! That's it.

    • Now we are done with the tutorials, OHH WAIT ONE THING IS LEFT, HOW DO I CHANGE THE CHECKRA1N VERSION IN ODYSSEYN1X?
    To change the checkra1n version, you have to edit CRSOURCE_amd64 and CRSOURCE_i686.
    To do that, execute these commands on a debian-based system:
    git clone https://github.com/raspberryenvoie/odysseyn1x.git
    cd odysseyn1x
    sudo ./build.sh
    FINALLY THAT IS THE END OF THIS TUTORIAL!

    I REALLY HOPE THAT THIS TUTORIAL WAS HELPFUL TO YOU, PLEASE TAKE A MOMENT AND JOIN ME ON OTHER PLATFORMS:


    Follow me on Twitter @iMAT_YouTube and YouTube for more updates!


    Install Odyssey on your iPhone / iPad - iOS 13.0 to iOS 13.7


    Odyssey!


    Many users are not a fan of cydia as its quite old now and is a bit slow. So they want a way out, but jailbreak is what they love!


    So Sileo is a perfect solution to their problem! Sileo is an advanced Installer and is really fast!


    Odyssey is the latest released jailbreak for iOS 13! Odyssey is compatible with all the versions from iOS 13.0 to 13.7!


    So if you have any device with A9, A10, A11, A12 and A13 chip, then you can jailbreak your device if you’re on the compatible iOS version.


    NOT SURE IF YOU CAN JAILBREAK OR NOT? THEN CLICK HERE TO CHECK WHETHER YOUR DEVICE IS COMPATIBLE WITH ANY JAILBREAK OR NOT!


    So before starting, backing up your device with iTunes or iCloud is a good idea.


    After that you’ll have to set up Altstore to enjoy Revoke-Free experience. So for that download Altstore from Windows Software page. After that complete the installation by following this video: 

    Watch Now: MacOs Tutorial (Click Here) / Windows Tutorial (Click Here).


    After that you need to download the Odyssey IPA file by Clicking here.


    Translate

    Google Search Console

    You may also like:

    How to Jailbreak iPhone on iOS 15.0 – iOS 16.6.1 Using Dopamine Jailbreak (Full Guide)

    Jailbreaking is finally back in a big way, and the Dopamine Jailbreak has quickly become one of the most popular modern jailbreak solutions ...

    Popular Posts