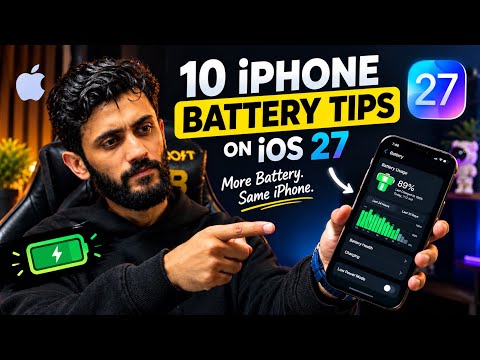
How to Improve iPhone Battery Life on iOS 27 Without Losing Performance

Is your iPhone battery draining faster than expected after updating to iOS 27? You do not necessarily need to sacrifice smooth animations, useful notifications, or the features you paid for to get better battery life.

In this guide, we will explore 10 practical iPhone settings that may help reduce unnecessary battery consumption while preserving everyday performance. We will also cover two common habits you should reconsider if you want your iPhone to remain responsive and enjoyable to use.

These tips are especially useful for people who use their iPhones for social media, messaging, browsing, video recording, productivity, and other everyday tasks. Your results will depend on your iPhone model, battery health, network conditions, and usage patterns.

Watch the iPhone Battery Saving Tutorial

Prefer watching the settings being changed on an actual iPhone? Watch the complete video tutorial below for a practical walkthrough of the battery-saving adjustments discussed in this article.

1. Manage Background App Refresh

Background App Refresh allows compatible apps to update their content when you are not actively using them. This can be convenient because an app may have newer information ready when you open it. However, background activity can contribute to battery consumption, depending on the app and how frequently it updates.

Rather than turning this feature off for every app, review which applications genuinely need background updates.

How to adjust Background App Refresh

  1. Open the Settings app on your iPhone.
  2. Navigate to General.
  3. Tap Background App Refresh.
  4. Choose whether background refresh should be available over Wi-Fi or Wi-Fi and Cellular Data, depending on your preferences.
  5. Disable background refresh for apps you rarely use or do not need updating in the background.

You might keep it enabled for selected productivity or frequently used apps while disabling it for shopping apps, games, and other applications that do not need regular background updates.

Why this helps: Limiting unnecessary background activity may reduce avoidable battery consumption without removing the features you regularly use.

2. Review Wi-Fi Assist

Wi-Fi Assist is designed to help maintain internet connectivity when your Wi-Fi connection performs poorly. On supported iPhones, it can automatically use cellular data when Wi-Fi connectivity is inadequate.

If your home or office Wi-Fi is reliable, you may want to review whether this feature is necessary for your usage. Disabling it can help avoid unexpected cellular data use, although the battery savings will vary.

How to check Wi-Fi Assist

  1. Open Settings.
  2. Tap Cellular or Mobile Service, depending on your region.
  3. Scroll down to Wi-Fi Assist.
  4. Turn it off if you prefer to avoid automatically switching to cellular data when Wi-Fi is weak.

Keep in mind that Wi-Fi Assist does not appear in the Wi-Fi settings on many iOS versions. Its availability and menu location may vary. If you rely on cellular connectivity when Wi-Fi becomes unreliable, leaving it enabled may be more convenient.

3. Adjust Siri and Voice Activation

Siri can be useful for setting reminders, sending messages, checking information, and controlling compatible smart devices. If you rarely use voice commands, review the Siri settings to decide which features you actually need.

Settings worth reviewing

  • Disable the voice activation or listening option if you do not use hands-free Siri.
  • Keep Siri enabled if you regularly depend on voice commands.
  • Review other Siri features and suggestions according to your preferences.

The exact wording of these options can differ between iOS releases. Turning off voice activation may reduce unnecessary listening-related activity, but the battery savings are not guaranteed to be significant.

Tip: You do not need to disable Siri completely if you use it regularly. The goal is to remove features you do not need, not to make your iPhone less convenient.

4. Optimize Dark Mode and Display Effects

Your iPhone display can be a significant source of battery consumption, particularly when the screen is bright or remains active for long periods. Display settings are therefore worth reviewing when trying to improve battery life.

Use Dark Mode where it makes a difference

Dark Mode changes many interface backgrounds and elements to darker colors. On iPhones with OLED displays, black pixels can use substantially less power than bright pixels, so Dark Mode may help reduce display power consumption.

On LCD-equipped models, the battery benefit can be much smaller because their backlight remains illuminated. The result also depends on the apps you use and how bright your screen is.

To enable Dark Mode, open Settings, select Display & Brightness, and choose Dark. You can enable Automatic if you prefer the appearance to change according to a schedule.

Review transparency and visual effects

Modern iOS interface effects can make the operating system feel more polished. If your version of iOS provides transparency or appearance controls, you can adjust them according to your preferences.

Reducing transparency may improve readability for some users, but it should not be treated as a guaranteed major battery-saving measure. The effect of individual interface settings on battery life can be small compared with screen brightness, cellular reception, and demanding apps.

Should you enable Reduce Motion?

Reduce Motion limits certain interface animations and motion effects. It is useful for people who prefer fewer animations, but you do not need to enable it solely for battery saving if you enjoy the standard iPhone interface.

Recommended approach: Choose the appearance you enjoy, keep brightness appropriate for your environment, and use accessibility settings when they improve your experience.

5. Control Location Services

Location Services allow apps to access location information for navigation, weather forecasts, delivery tracking, fitness activities, and other features. Some apps need location access only while you use them, while others may request it in the background.

Reviewing these permissions can help reduce unnecessary location access while preserving the features you rely on.

How to review location permissions

  1. Open Settings.
  2. Go to Privacy & Security.
  3. Tap Location Services.
  4. Select an app to review its location permission.
  5. Choose an appropriate option, such as Never, Ask Next Time or When I Share, While Using the App, or Always, where available.

For shopping apps, simple utilities, and apps that do not need continuous location updates, consider restricting access. For navigation, exercise tracking, and other apps that require background location, make sure you understand the impact before changing their permissions.

Weather apps may work with location access while in use or with a manually selected city. Background updates and location-based notifications can require additional permissions.

Review System Services

The System Services section contains additional location-related options used by iOS features. Review these settings carefully and disable only those services you do not need or understand.

Important: Restricting location access can affect navigation, device features, emergency-related functions, and other services. Battery saving should not come at the expense of essential functionality.

6. Choose the Right Cellular Data Settings

Cellular connectivity can affect battery life, especially when your iPhone is in an area with weak or inconsistent network coverage. Your device may use more energy when searching for a signal or maintaining a connection.

Depending on your carrier, iPhone model, and region, you may see options such as LTE, 5G Auto, and 5G On.

5G Auto versus 5G On

  • 5G Auto: Allows the iPhone to balance connectivity and battery use by using 5G when it provides a meaningful benefit and switching to LTE when appropriate.
  • 5G On: Prefers 5G whenever it is available, which may increase battery consumption in some situations.
  • LTE: Uses LTE instead of 5G and can be worth considering if 5G coverage is weak or unavailable in your area.

How to change your voice and data mode

  1. Open Settings.
  2. Tap Cellular or Mobile Service.
  3. Select your SIM or cellular line if necessary.
  4. Open Voice & Data.
  5. Select the option that best suits your network coverage and usage.

Menu names and available options vary by carrier, iPhone model, and iOS version. If 5G works reliably in your area, 5G Auto is a sensible starting point. If coverage is poor, compare your experience with LTE where available.

7. Reduce Unnecessary Notifications

Notifications help you stay informed, but constant alerts from shopping apps, social networks, games, and promotional services can create unnecessary interruptions. Notifications can also wake the screen and contribute to battery consumption.

Instead of disabling all notifications, keep alerts for the people, apps, and services that matter to you.

How to manage notifications

  1. Open Settings.
  2. Tap Notifications.
  3. Select an application.
  4. Turn off Allow Notifications for apps whose alerts you do not need, or adjust their delivery options.

For example, you might keep notifications enabled for calls, messaging, banking security alerts, and parcel updates while disabling promotional alerts from shopping apps.

Disabling notifications does not necessarily stop an app from running in the background. It simply limits the alerts delivered by that app. Manage Background App Refresh separately when appropriate.

Battery-saving benefit: Reducing unnecessary alerts can limit screen wake-ups and make your phone less distracting throughout the day.

8. Adjust Screen Brightness

Display brightness is one of the most useful settings to review when trying to extend iPhone battery life. A very bright screen can consume more power, particularly during extended browsing, gaming, video recording, and video playback.

Should you use Auto-Brightness?

Auto-Brightness adjusts screen brightness according to the surrounding lighting conditions. It can be useful if you regularly move between bright outdoor environments and darker indoor spaces.

If you work mainly in a controlled indoor environment, you may prefer to set brightness manually to a comfortable level. There is no single ideal percentage for every user because screen visibility depends on ambient light and personal preference.

How to adjust brightness

  • Open Control Center and move the brightness slider.
  • Alternatively, open Settings and select Display & Brightness.
  • Review Auto-Brightness under Accessibility settings if you want to change how brightness responds to ambient light.

Avoid setting brightness so low that reading becomes difficult. The objective is to use only as much brightness as you need, not to compromise visibility.

9. Review Analytics, Privacy, and Sharing Settings

iOS includes settings related to analytics, diagnostics, usage information, and certain reporting features. Reviewing them is a reasonable way to decide what information you want to share with Apple and how you prefer your device to operate.

Depending on your iPhone model, installed iOS version, and enabled features, you may find settings related to analytics and improvements, Apple advertising, app privacy reports, or Apple Intelligence reporting.

Where to look

  1. Open Settings.
  2. Review Privacy & Security for available analytics and advertising controls.
  3. Look under Analytics & Improvements, if available.
  4. Review Apple Intelligence and Siri settings if your device supports those features.

Turn off optional sharing or reporting features if you do not want to participate in them. However, do not assume that every reporting or privacy feature uses substantial battery power. Their effect varies, and disabling them may not produce a noticeable improvement.

Privacy tip: Make these decisions based on your privacy preferences as well as battery goals. Keep in mind that the exact menu names and available controls may differ between iOS releases.

10. Adjust Email Fetching Frequency

If you have multiple email accounts on your iPhone, the way new messages are retrieved can affect background activity. Depending on the account provider and configuration, Mail may use Push or Fetch to check for new messages.

If you mainly use another email app or do not need instant email updates, you can consider reducing how frequently the built-in Mail app checks for new messages.

How to change email fetching

  1. Open Settings.
  2. Go to Apps and select Mail on iOS versions that use this menu structure.
  3. Open Mail Accounts or the relevant account settings.
  4. Find Fetch New Data, if available.
  5. Choose a suitable fetching schedule or Manual for accounts that support it.

On some configurations, the menu may be located under Settings, Mail, and Accounts. The exact path depends on your iOS version.

More frequent fetching can deliver messages sooner but may increase background activity. A less frequent schedule can reduce unnecessary checks, although the effect on overall battery life may be modest.

If you need timely work emails, security notifications, or other important messages, choose a schedule that meets those needs. Remember that changing the built-in Mail settings does not necessarily change how third-party email apps retrieve messages.

Two Common Battery Habits to Avoid

Habit 1: Force-closing every app repeatedly

It may seem logical to close every app in the app switcher to save battery, but routinely force-closing apps is generally unnecessary on iOS. Apps that are suspended in the background typically do not continuously use processor resources in the same way as an active app.

When you reopen a force-closed app, it may need to reload content and restart its activity. This can sometimes require additional resources. For most everyday use, let iOS manage background apps automatically.

Force-close an app when it becomes unresponsive or behaves incorrectly, rather than treating it as a daily battery-saving routine.

Habit 2: Using Low Power Mode all the time without considering the trade-offs

Low Power Mode is a useful feature when your battery is running low or you need to extend usage until your next charge. It reduces or limits certain background activities and system features to conserve energy.

However, it can also affect some performance-related features. On iPhone models with ProMotion, Low Power Mode limits the display refresh rate to up to 60 Hz. It may also change other behaviors, depending on your device and iOS version.

If you prefer the full experience of your iPhone and have sufficient battery remaining, you do not need to keep Low Power Mode enabled all the time. Use it when you need the extra runtime rather than assuming it is always the best setting.

There is no need to avoid Low Power Mode completely. It is a legitimate battery-management tool, particularly when charging is not immediately available.

Bonus: Protect Your iPhone Battery Health

Battery life and battery health are related, but they are not the same thing. Battery life refers to how long your iPhone operates between charges. Battery health reflects the battery's condition and its ability to retain capacity over time.

If your iPhone drains quickly despite reasonable settings, check the battery information before making extensive changes.

Check battery usage

  1. Open Settings.
  2. Tap Battery.
  3. Review recent battery usage and activity by app.
  4. Look for apps with unusually high consumption relative to how much you use them.

This can help you identify whether a particular app, heavy screen use, or network activity is contributing to the problem.

Check battery health

On supported iPhone models, open Settings and select Battery, then Battery Health or Battery Health & Charging, depending on the iOS version. Review the maximum capacity and any service recommendations displayed by the system.

Lithium-ion batteries naturally lose capacity as they age. If maximum capacity has declined significantly or the phone reports a battery service issue, changing software settings alone may not restore the original runtime.

Use charging features appropriately

If your iPhone provides Optimized Battery Charging or a charging limit, consider using these features according to your daily charging routine. They are designed to help manage battery aging, not to guarantee a particular battery lifespan.

Avoid exposing your iPhone to excessive heat, especially while charging or running demanding applications. Temperature management is an important part of long-term battery care.

Final Thoughts: Improve iPhone Battery Life Without Sacrificing the Experience

Improving iPhone battery life does not require disabling every useful feature or turning your premium smartphone into a basic device. A more balanced approach is to identify unnecessary background activity, review location permissions, reduce unwanted notifications, choose suitable cellular settings, and use a comfortable screen brightness.

Start with the settings most relevant to your usage. For many people, managing background activity, screen brightness, weak cellular connections, and unnecessary alerts is a more practical starting point than disabling every visual effect or system service.

After making changes, monitor your battery usage over several days. This will help you understand which adjustments make a real difference on your particular iPhone.

Keep in mind that battery performance depends on several factors, including battery condition, apps, network coverage, screen usage, and the iOS version installed. No single collection of settings can guarantee the same results for everyone.

If this guide helped you, watch the embedded video, subscribe to the channel, and explore more practical technology tutorials and product reviews from iMAT Gadgets.

Support iMAT Gadgets

If you appreciate our independent technology content, you can support the channel using the links below.

💳 Join the channel membership:
Become an iMAT Gadgets channel member

💵 Support our work on Patreon:
Support iMAT Gadgets on Patreon

Disclaimer: This article is for general informational purposes. Settings, menu names, and available features may vary by iPhone model, iOS version, carrier, and region. Battery-saving results are not guaranteed. Review settings carefully before changing features you rely on.
How to Jailbreak iPhone on iOS 15.0 – iOS 16.6.1 Using Dopamine Jailbreak (Full Guide)

Jailbreaking is finally back in a big way, and the Dopamine Jailbreak has quickly become one of the most popular modern jailbreak solutions for iPhones running iOS 15 and iOS 16.

In this detailed step-by-step guide, we will show you how to install Dopamine Jailbreak using AltStore, supported devices, compatibility requirements, Sileo installation, and important things you should know before jailbreaking your iPhone.

In this tutorial, we successfully jailbreak an iPhone 7 running iOS 15.8.2 using Dopamine Jailbreak.


Table of Contents


Watch Full Video Tutorial (Recommended)


Dopamine Jailbreak Compatibility

Dopamine Jailbreak supports a wide range of Apple devices running compatible iOS versions.

Supported Architectures

Supported iOS Versions

However, there are some important restrictions:

  • A12 and newer devices are NOT supported on iOS 16.6 – 16.6.1
  • A15 – A16 devices and M2 devices are NOT supported on iOS 16.5.1 and 16.6.1
  • No devices are supported on iOS 15.8.7

Before proceeding, make sure automatic iOS updates are disabled on your iPhone. Accidentally updating to unsupported firmware may permanently remove jailbreak compatibility.


Requirements Before Jailbreaking

Before starting the installation process, make sure you have:

  • A supported iPhone or iPad
  • A Mac or Windows PC
  • Lightning or USB-C cable
  • Stable internet connection
  • Apple ID (preferably a spare account)
  • AltStore
  • Dopamine IPA file

Using a secondary Apple ID is highly recommended for sideloading applications.


How to Install AltStore

To install Dopamine Jailbreak, we first need AltStore.

Step 1: Download AltServer

Visit the AltStore website and download:

Users in the European Union and Japan may also see AltStore PAL support.

Step 2: Install AltServer

After downloading:

  • Open the ZIP file
  • Launch AltServer
  • Allow local network permissions

Step 3: Connect Your iPhone

Use a Lightning cable or USB-C cable compatible with your device.

Once connected:

  • Click on the AltServer icon
  • Select “Install AltStore”
  • Choose your iPhone

Step 4: Enter Apple ID

Enter your Apple ID credentials. AltStore mentions that credentials are only sent to Apple for authentication, but using a spare Apple ID is still recommended.

Step 5: Trust the Developer Certificate

After installation:

  • Go to Settings
  • General
  • VPN & Device Management
  • Select your Apple ID
  • Tap Trust

AltStore should now open successfully.


How to Install Dopamine Jailbreak

Step 1: Download Dopamine IPA

Visit the official Dopamine Jailbreak website and download the latest IPA file.

The file size is around 53MB.

Step 2: Open in AltStore

After downloading:

  • Tap the Share button
  • Select “Open in AltStore”

AltStore may ask you to log in again.

Step 3: Install the IPA

Once logged in:

  • Tap Install
  • Wait for the IPA to finish installing

After completion, the Dopamine app will appear on your home screen.


How to Jailbreak Your iPhone

Now comes the exciting part — jailbreaking your iPhone.

Step 1: Open Dopamine

Launch the Dopamine application from the home screen.

You will see multiple options including:

  • Tweak Injection
  • Settings
  • Package Manager Selection

Step 2: Start the Jailbreak

Tap on the Jailbreak button.

Select your preferred package manager. In this tutorial, we selected:

  • Sileo

Step 3: Wait for the Process

Dopamine will begin:

  • Downloading kernel files
  • Applying jailbreak patches
  • Preparing the system

Your device may reboot during the process.

Step 4: Set Terminal Password

You will be asked to create a terminal password for command-line tools such as sudo.

Choose a secure password and remember it carefully.


Installing Sileo Package Manager

After the jailbreak process finishes, your iPhone should reboot back to the home screen.

If successful, you will now see:

  • Sileo installed

Sileo acts as the package manager for downloading tweaks, themes, and jailbreak modifications.

You can now start customizing your iPhone with:

  • Jailbreak tweaks
  • UI themes
  • Advanced customization
  • System utilities
  • Developer tools


Important Warnings & Issues

Disable Automatic Updates

Do NOT update to iOS 15.8.7 or unsupported firmware versions.

Always disable:

  • Automatic Updates
  • Automatic Security Responses

Use Trusted Sources

Only download Dopamine Jailbreak from its official website.

Avoid fake jailbreak tools and suspicious IPA files.

Potential Risks

Jailbreaking may:

Proceed carefully and always create backups before modifying your device.


Final Thoughts

The Dopamine Jailbreak is currently one of the best jailbreak solutions for modern iPhones running iOS 15 and iOS 16. Its rootless architecture improves stability while still offering powerful customization features.

In our testing, the jailbreak process on the iPhone 7 running iOS 15.8.2 completed successfully and Sileo installed without issues.

If you have been waiting to return to the jailbreaking scene, Dopamine is one of the safest and most polished options currently available.

Always double-check compatibility before updating or jailbreaking your device.


Support iMAT Gadgets

💳 Join the channel membership:
Join Here

💵 Support our work:

🏦 Paypal:
https://PayPal.me/imatreviews

🏦 Patreon:
https://patreon.com/iMATGadgets


Conclusion

Dopamine Jailbreak brings back the freedom that many iPhone users missed after recent iOS updates. With support for multiple devices, Sileo integration, rootless design, and excellent stability, it remains one of the top jailbreak tools in 2026.

If this guide helped you successfully jailbreak your iPhone, make sure to check out more tutorials, jailbreak guides, and Apple customization content on iMAT Gadgets.

YouTube SEO: How I Rank #1 on YouTube in 2026 (Proven Strategy)

Ranking #1 on YouTube in 2026 is not luck — it’s strategy.

In this guide, I’ll break down the exact system I’ve used to rank 1,000+ videos and generate 140M+ views. This is a complete step-by-step method you can apply today.

📌 Table of Contents


🎬 Watch the Full Video


🚀 What is the KVS Strategy?

The KVS Strategy is a 3-step blueprint to rank videos:

  • K = Keyword
  • V = Video
  • S = SEO

Most creators fail because they upload first and optimize later. This strategy flips that — you start with the keyword and build everything around it.


🔍 Step 1: Keyword Research (The Most Important Step)

Before you even record your video, you must find a high-ranking keyword.

✅ What Makes a Perfect Keyword?

  • Low competition
  • Good search volume
  • No exact match title used by competitors

📊 How to Find Keywords

Use VidIQ (Click Here) to research keywords:

  • Search a broad keyword (e.g., “video editing”)
  • Click Matching Terms
  • Go deeper into more specific keywords
  • Find long-tail keywords with opportunity

Once you find a keyword, search it on YouTube and analyze:

  • Are small channels ranking?
  • Are videos getting views per hour?
  • Is your exact keyword missing in titles?

If YES → You’ve found a winning keyword 🔥


🎥 Step 2: Video Optimization (Where Most Fail)

Having a keyword is not enough — your content must be better than competitors.

📌 What You Should Do

  • Watch top-ranking videos completely
  • Analyze what they do well
  • Read comments for improvement ideas
  • Create a better, clearer, more valuable video

Pro Tip: Comments are gold. They reveal exactly what viewers want.


⚙️ Step 3: YouTube SEO (Ranking Engine)

📝 Title Optimization

Use your exact keyword in the title:

Example: “3D After Effects Video Reels Editing Tutorial (Step-by-Step)”

📄 Description Optimization

  • Paste your main keyword at the top
  • Add related keywords naturally
  • Explain your video clearly

🖼️ Thumbnail Strategy

  • Make it better than competitors
  • Keep it simple and bold
  • Add curiosity (but don’t clickbait)

🏷️ Tags

Tags are less important, but still useful. Use tools to generate them quickly.


🧠 Tools You Need (VidIQ)

If you’re serious about growing on YouTube, you NEED proper tools.

👉 Get VidIQ Here

With VidIQ, you can:

  • Find low-competition keywords
  • Analyze competitors
  • Track views per hour
  • Discover trending topics

🔥 Pro Tips to Rank #1 Faster

  • Say your keyword in the first 10 seconds
  • Keep audience retention high
  • Focus on CTR (thumbnail + title)
  • Target long-tail keywords
  • Upload consistently

🌐 Related Article


💰 Support & Community

💳 Join Channel Membership

🏦 Support via PayPal

🏦 Support on Patreon


📌 Final Thoughts

If you follow the KVS Strategy (Keyword → Video → SEO), you can rank #1 on YouTube — even with a small channel.

The biggest mistake creators make is skipping keyword research. Fix that, and your growth will change completely.

Start applying this today and watch your channel grow 🚀

How to Get Monetized on YouTube (All Proven Ways in 2026)

Want to make money on YouTube in 2026? You're not alone.

With millions of creators uploading daily, YouTube is no longer just a video platform — it’s a full-time income source for smart creators.

But here’s the reality:

Most people struggle to get monetized — not because it’s hard, but because they don’t know the right strategies.

In this complete guide, you’ll learn all proven ways to monetize YouTube, including official methods, hidden income streams, and advanced strategies used by successful creators.

Whether you’re starting from zero or already growing your channel, this guide will help you turn YouTube into a real income stream.


📌 Table of Contents


YouTube Monetization Requirements

Before you start earning money on YouTube, you need to qualify for the YouTube Partner Program (YPP).

Basic Requirements:

  • 1,000 subscribers
  • 4,000 watch hours in the last 12 months OR 10 million Shorts views in 90 days
  • Follow YouTube policies and guidelines
  • Have an AdSense account

However, here’s something most beginners don’t realize:

You can start making money on YouTube even before getting monetized.

Let’s break down all the proven methods.


1. YouTube AdSense Revenue (The Classic Method)

This is the most well-known way to earn money on YouTube.

How It Works:

You earn money from ads shown on your videos — including display ads, skippable ads, and non-skippable ads.

How Much Can You Earn?

  • $0.5 to $5 per 1,000 views (average)
  • Higher in countries like the USA, UK, Canada

What Affects Earnings:

  • Your niche (tech, finance, and business pay more)
  • Audience location
  • Watch time and engagement

Pro Tip: Longer videos (8+ minutes) allow mid-roll ads, increasing revenue.


2. YouTube Shorts Monetization

YouTube Shorts is one of the fastest ways to grow your channel and earn money.

How It Works:

YouTube shares ad revenue generated between Shorts videos in the feed.

Requirements:

  • 1,000 subscribers
  • 10 million Shorts views in 90 days

Reality:

Shorts earnings are lower than long-form videos, but they help you grow faster and attract subscribers.

Best Strategy: Use Shorts for growth, long videos for income.


3. Channel Memberships

Channel memberships allow your audience to support you monthly.

Requirements:

  • 1,000 subscribers

What You Can Offer:

  • Exclusive videos
  • Behind-the-scenes content
  • Member-only live streams

Tip: Even 100 loyal members can generate consistent monthly income.


4. Super Chat, Super Stickers & Super Thanks

These features allow viewers to donate during live streams or videos.

Best For:

  • Live streamers
  • Q&A sessions
  • Gaming channels

Strategy: Engage with viewers in real-time to increase donations.


5. Brand Deals & Sponsorships (Biggest Income Source)

This is where most full-time YouTubers make serious money.

How It Works:

Brands pay you to promote their products in your videos.

Earnings Potential:

  • Small creators: $100–$500 per video
  • Mid-level: $500–$5,000+
  • Large creators: $10,000+

How to Get Deals:

  • Focus on a niche
  • Build audience trust
  • Reach out to brands
  • Create a media kit

Important: Engagement matters more than subscriber count.


6. Affiliate Marketing (Best for Beginners)

Affiliate marketing allows you to earn commission by promoting products.

How It Works:

You include affiliate links in your video description. When someone buys through your link, you earn a commission.

Best Platforms:

  • Amazon Associates
  • AliExpress Affiliate
  • ClickBank

Content Ideas:

  • Product reviews
  • Top 5 recommendations
  • Unboxing videos

Why It Works: No monetization approval required.


7. Selling Your Own Products

You can create and sell your own products directly to your audience.

Examples:

  • Merchandise (t-shirts, hoodies)
  • Tech gadgets (if you run a store like yours)
  • Custom accessories

Tip: Build a strong personal brand to increase sales.


8. Selling Services

Your YouTube channel can act as a lead generation machine.

Examples:

  • Freelancing services
  • Video editing
  • Consulting

Show your expertise through content and attract clients.


9. Selling Courses & Digital Products

This is one of the highest profit-margin income streams.

Examples:

  • Online courses
  • E-books
  • Templates

Pro Tip: Teach what you already know — your audience will pay for structured knowledge.


Pro Growth & Monetization Strategies

1. Pick a Profitable Niche

Focus on niches like tech, finance, AI, or education.

2. Master Click-Through Rate (CTR)

Your thumbnail and title determine your success.

3. Hook Viewers in First 10 Seconds

Retention is key for YouTube’s algorithm.

4. Upload Consistently

At least 2–3 videos per week.

5. Optimize for SEO

Use keywords in titles, descriptions, and tags.


Common Mistakes to Avoid

  • Uploading without a strategy
  • Ignoring thumbnails and titles
  • Quitting too early
  • Focusing only on AdSense
  • Not building an audience connection

Truth: Most creators fail because they stop too soon.


Final Thoughts

Getting monetized on YouTube in 2026 is not just about hitting 1,000 subscribers — it’s about building a system that generates income.

The smartest creators don’t rely on one income stream. They combine:

  • AdSense
  • Affiliate marketing
  • Brand deals
  • Digital products

The opportunity is huge — but only for those who take action.

Start today, stay consistent, and treat YouTube like a business.


🔥 Quick Monetization Checklist

  • Choose a niche
  • Create high-quality videos
  • Optimize titles & thumbnails
  • Add affiliate links
  • Engage with your audience
  • Reach out to brands

Your YouTube monetization journey starts now.

How to Grow an Audience if You Have 0 Followers (Proven Strategy That Actually Works)

If you're starting from zero followers, you're not alone—and you're not at a disadvantage. In fact, every successful creator once started exactly where you are today.

The real problem? Most people expect results too fast. They think they'll “blow up” in 90 days. But the truth is very different.

This guide breaks down a proven long-term strategy to build a loyal audience from scratch—based on real-world experience, consistency, and mindset shifts.


📌 Table of Contents


The Reality of Growing from 0 Followers

Most creators quit too early because they expect fast results.

But building an audience is not a 90-day game—it’s a long-term commitment. Many successful creators spent years posting content before gaining traction.

Growth doesn’t happen overnight. It happens quietly, in the background, while you're improving your skills and building consistency.

Key Insight: If you think in days, you’ll quit. If you think in years, you’ll win.


Shift Your Mindset: Stop Thinking Short-Term

Instead of focusing on results like followers, views, or money, focus on what you can control:

  • Did you post today?
  • Did you improve your content?
  • Did you learn something new?

Everyone wants to be successful—but goals alone don’t make you unique.

Your actions do.

When you stop chasing outcomes and start focusing on daily actions, growth becomes inevitable.


Consistency is the Real Growth Hack

Most people underestimate the power of consistency.

Imagine creating:

  • 1 video per week → 52 videos per year
  • 400+ pieces of content → massive growth potential

If you consistently post high-value content, your audience will grow. It’s not a matter of if—it’s a matter of when.

Important: Even when you don’t see results, keep going.


Develop Skills While You Grow

In the beginning, your content might not be great—and that’s okay.

You're learning:

  • How to communicate better
  • How to present ideas clearly
  • How to entertain and educate

Your content improves over time, and so does your confidence.

The best creators evolve. Their topics expand, their delivery improves, and their audience grows naturally.


Why Most Creators Fail (And How to Avoid It)

Many creators fall into a dangerous cycle:

  1. They post consistently
  2. They see some success
  3. They stop posting
  4. Growth disappears
  5. They panic and restart

This inconsistency kills long-term growth.

Solution: Stay consistent regardless of results.

Whether you're winning or losing—keep posting.


The Right Strategy to Grow Faster

Here’s a simple but powerful framework:

1. Focus on Doing, Not Outcomes

Stop obsessing over views and followers. Focus on creating content daily.

2. Improve with Every Post

Make each video slightly better than the last.

3. Share Real Experiences

Do more in real life so you have valuable insights to share.

4. Stay Consistent for Months (Not Days)

Growth often comes after long periods of effort.

5. Think in Decades

If you commit long-term, success becomes inevitable.


🎥 Watch the Full Video

Here’s the full breakdown in video format:


Final Thoughts

Growing an audience from zero is not about luck—it’s about consistency, patience, and mindset.

Every successful creator you see today once had no followers.

The difference?

They didn’t quit.

If you commit to the process, improve your skills, and stay consistent, your growth is only a matter of time.

Start today. Stay consistent. Think long-term.


🚀 Bonus Tip

If you create 400+ pieces of content, your audience will be bigger than it is today. Guaranteed.

How to Make Money with Pinterest (2026 Guide) – Passive Income Strategy

Want to make money online without creating extra content?

In 2026, Pinterest has become one of the most underrated platforms for generating passive income. While most creators focus on YouTube, TikTok, or Instagram, Pinterest quietly drives traffic, sales, and affiliate commissions behind the scenes.

In this guide, you’ll learn exactly how to make money with Pinterest using automation, affiliate marketing, and content repurposing — even if you don’t have your own product.


📌 Table of Contents


🎥 Watch Full Video Guide

Here’s a complete breakdown of this Pinterest money-making strategy:


🚀 Why Pinterest is Powerful in 2026

Pinterest is not just a social media platform — it’s a visual search engine. Millions of users visit Pinterest daily to discover ideas, products, and inspiration.

  • Users are actively looking to buy products
  • Content has a longer lifespan than TikTok or Instagram
  • Perfect for niches like fashion, tech, beauty, and lifestyle
  • Drives high-quality traffic to websites and affiliate links

This makes Pinterest one of the best platforms for passive income.


🔄 How to Automatically Post to Pinterest

The smartest way to grow on Pinterest is by automating your content.

You don’t need to create new videos — you can reuse your existing content from:

  • Instagram Reels
  • TikTok videos
  • YouTube Shorts

Using tools like Repurpose.io, you can automatically post your content to Pinterest.

How It Works:

  1. Connect your Instagram or TikTok account
  2. Select Pinterest as the destination
  3. Create a workflow
  4. Enable auto-posting for future and existing content

Once set up, your videos will be posted automatically — no manual work required.


💰 How Pinterest Makes You Money

Here’s where things get interesting.

Pinterest itself doesn’t directly pay for views like YouTube, but it helps you generate income through:

  • Product sales
  • Affiliate marketing
  • Traffic to your website

Each pin (post) can include a clickable link. When users click and buy, you earn money.

This turns Pinterest into a powerful sales funnel.


🛍️ Affiliate Marketing Strategy

If you don’t have your own product, no problem.

You can promote other people’s products and earn commissions using affiliate marketing.

Popular Affiliate Platforms:

  • Amazon Associates
  • TikTok Shop
  • AliExpress Affiliate Program

Example Strategy:

  1. Create content around a product (e.g., smartwatch, beauty item)
  2. Get your affiliate link
  3. Add the link to your Pinterest posts
  4. Earn commission on every sale

Even small creators can generate consistent monthly income using this method.


⚙️ Step-by-Step Setup Guide

Step 1: Create a Pinterest Business Account

This gives you analytics and access to monetization features.

Step 2: Set Up Automation Tool

Use Repurpose.io to connect your social media accounts.

Step 3: Upload Existing Content

Repurpose your old videos to maximize reach.

Step 4: Add Monetized Links

Insert your product or affiliate links into your pins.

Step 5: Stay Consistent

The more content you post, the higher your chances of going viral.


🔥 Pro Tips to Maximize Earnings

  • Focus on trending niches (tech, gadgets, fashion)
  • Use vertical videos (9:16 format)
  • Write engaging titles and descriptions
  • Add strong call-to-actions
  • Use SEO keywords in your pins

Consistency + smart linking = passive income.


🎯 Final Thoughts

Pinterest is one of the most overlooked ways to make money online in 2026.

By combining content repurposing, automation, and affiliate marketing, you can build a passive income stream without extra effort.

If you’re already creating content for Instagram or TikTok, you’re leaving money on the table by not using Pinterest.

Start today, automate your workflow, and let your content work for you 24/7.

How to Get Monetized on TikTok (All Proven Ways in 2026)

Want to make money on TikTok in 2026? You're not alone.

With over 1 billion active users, TikTok has evolved from a short-form video app into a powerful income platform. Whether you're a beginner or already growing your account, this guide will show you all proven ways to monetize TikTok — even if you don’t have millions of followers.

In this complete guide, you'll learn:

  • How TikTok monetization works
  • Requirements for earning money
  • All official and unofficial monetization methods
  • Advanced strategies used by top creators

📌 Table of Contents


TikTok Monetization Requirements

Before you can start earning, TikTok has certain eligibility criteria depending on the monetization method.

  • Be at least 18 years old
  • Have a minimum number of followers (varies by program)
  • Follow TikTok Community Guidelines
  • Be located in a supported country (for some features)

However, here's the truth most people don’t tell you:

You don’t need thousands of followers to start making money on TikTok. Many monetization methods work even with small audiences.


1. TikTok Creator Fund

The TikTok Creator Fund is one of the most well-known ways to earn money directly from TikTok.

Requirements:

  • 10,000+ followers
  • 100,000 video views in the last 30 days
  • 18+ age requirement

How it Works:

TikTok pays you based on your video performance, including views, engagement, and audience retention.

Reality Check:

While it sounds exciting, payouts are usually low. Most creators earn between $0.02 to $0.04 per 1,000 views.

Verdict: Good for beginners, but not a primary income source.


2. TikTok Creativity Program (Beta)

This is an upgraded version of the Creator Fund and offers significantly higher payouts.

Requirements:

  • 10,000+ followers
  • 100,000 views in last 30 days
  • Videos must be longer than 1 minute

Why It’s Better:

The Creativity Program rewards longer, high-quality content. Creators are reporting much higher earnings compared to the Creator Fund.

Pro Tip: Focus on storytelling, tutorials, and engaging content over 60 seconds.


3. Live Gifts & Diamonds

Going live on TikTok can be a great way to earn real-time income.

Requirements:

  • 1,000 followers

How It Works:

Viewers send virtual gifts during your live stream. These gifts are converted into diamonds, which can be cashed out.

Best Practices:

  • Engage with your audience
  • Host Q&A sessions
  • Do challenges or live reviews

Tip: Consistency is key — go live regularly.


4. Brand Deals & Sponsorships (Highest Earning Method)

This is where real money is made on TikTok.

Brands pay creators to promote their products or services. Even small creators (5K–10K followers) can earn money through sponsorships.

How Much Can You Earn?

  • 5K–10K followers: $50–$200 per post
  • 50K+ followers: $500–$2,000+
  • 100K+: $1,000–$10,000+

How to Get Brand Deals:

  • Choose a niche (tech, fitness, fashion, etc.)
  • Create consistent content
  • Reach out to brands directly
  • Use influencer marketplaces

Pro Tip: Your engagement rate matters more than follower count.


5. Affiliate Marketing (Best for Beginners)

Affiliate marketing is one of the easiest ways to start earning on TikTok.

How It Works:

You promote a product and earn a commission for every sale made through your link.

Popular Platforms:

  • Amazon Associates
  • AliExpress Affiliate
  • ClickBank

Content Ideas:

  • Product reviews
  • Unboxing videos
  • “TikTok made me buy it” videos

Why It Works: No follower requirement — you can start from day one.


6. TikTok Shop

TikTok Shop allows creators to sell products directly through the platform.

Ways to Earn:

  • Sell your own products
  • Promote other sellers’ products (commission-based)

Best Strategy:

Create short, engaging videos showcasing product benefits and real-life usage.

Trend Alert: TikTok Shop is one of the fastest-growing monetization methods in 2026.


7. Selling Your Own Services

If you have a skill, TikTok can be your biggest client acquisition tool.

Examples:

  • Video editing services
  • Social media management
  • Graphic design
  • Freelancing

Create content that demonstrates your expertise and attracts clients.


8. UGC Content Creation (Hidden Goldmine)

UGC (User-Generated Content) is one of the most underrated ways to earn.

Brands pay you to create content for them — but you don’t need to post it on your own account.

Why It’s Powerful:

  • No need for large following
  • High demand
  • Consistent income potential

Tip: Build a portfolio and pitch to brands.


Pro Monetization Strategies

Want to maximize your earnings? Use these proven strategies:

1. Focus on a Niche

Choose one category and stick to it. This builds authority and attracts brands.

2. Hook Viewers in First 3 Seconds

Your opening determines whether your video goes viral or not.

3. Post Consistently

Aim for 1–3 videos per day.

4. Use Trends Smartly

Jump on trends but add your unique twist.

5. Build Trust

Authenticity increases conversions and long-term earnings.


Common Mistakes to Avoid

  • Trying to monetize too early without value
  • Posting random, inconsistent content
  • Ignoring audience engagement
  • Over-promoting products
  • Not analyzing performance metrics

Remember: TikTok rewards creators who focus on value first.


Final Thoughts

Getting monetized on TikTok in 2026 is easier than ever — but only if you use the right strategy.

You don’t need millions of followers. What you need is:

  • Consistency
  • High-quality content
  • A clear monetization plan

Start with affiliate marketing or UGC, then scale into brand deals and TikTok Shop.

The biggest mistake? Waiting too long to start.

So pick a method, start posting today, and turn TikTok into your income machine.


🔥 Quick Monetization Checklist

  • Pick a niche
  • Create daily content
  • Add affiliate links
  • Engage with audience
  • Reach out to brands

Your TikTok monetization journey starts now.

How To Get Your Website Approved For Google AdSense In 10 Steps (2026 Guide)

Getting your website approved by Google AdSense is one of the biggest milestones for any blogger or website owner.

Once approved, you can start earning passive income by displaying ads on your content.

In this complete guide, I’ll walk you through 10 proven steps that can help you get approved quickly—even if your website was rejected before.

📌 Table of Contents


🎥 Watch Full Video Tutorial


1. Create Enough Content

Your website must not look empty or unfinished. Avoid "under construction" pages or placeholder content.

  • Write at least 1–3 detailed blog posts (1500–2500 words)
  • Add essential pages like Home, About, and Contact

2. Write Unique Content

Google strictly rejects copied or duplicate content.

  • Write original articles
  • Avoid copying from other websites
  • Use your own voice and experience

3. Attract Real Visitors

Traffic matters—but it must be genuine.

  • Share your content on social media
  • Avoid bots or fake traffic tools
  • Focus on organic growth

4. Focus on Quality Content

High-quality content increases approval chances.

  • Provide value to readers
  • Fix grammar mistakes
  • Avoid duplicate posts

5. Improve Website Navigation

Your website must be easy to use.

  • Clear menu structure
  • Mobile-friendly design
  • Consistent layout across devices

6. Add Privacy Policy

A privacy policy is mandatory for AdSense approval.

  • Mention data collection and ads usage
  • Include Terms & Conditions page
  • Add Disclaimer page if needed

7. Link Your Website to AdSense

After creating your AdSense account:

  • Connect your website
  • Add AdSense verification code
  • Wait for review

8. Enable GDPR & Cookie Consent

Make your website compliant with privacy laws.

  • Add cookie consent banner
  • Enable GDPR settings
  • Ensure transparency

9. Upload ads.txt File

This step is required after approval.

  • Download ads.txt from AdSense
  • Upload it to your root domain
  • Verify installation

10. Publish Seller Information

Make your AdSense account transparent.

  • Set seller visibility to "Public"
  • Add your domain name

💰 Final Thoughts

Getting approved for Google AdSense is not difficult if you follow the right strategy. Focus on quality content, user experience, and compliance.

Remember: AdSense approval is just the beginning. To earn real money, you need consistent traffic and valuable content.

If your website gets rejected, don’t worry. Fix the issues and apply again.


🚀 Pro Tip

Websites with fewer but high-quality posts often get approved faster than sites with lots of low-quality content.

Stay consistent, keep improving, and your approval will come!

🌐 Related Article

HK11 Pro Max Gen 2 vs Dateoy Watch 11 Pro – Full Comparison | Which One Should You Buy?

If you're looking for the best Series 11 smartwatch alternative in 2026,

this detailed comparison between the HK11 Pro Max Gen 2 and the Dateoy Watch 11 Pro will help you decide which one deserves your money.

Both smartwatches offer premium looks, AMOLED displays, calling features, always-on display, watch face customization, and smart apps. However, there are major differences in software experience, body design, accessories compatibility, battery, and storage.

In this detailed comparison, we’ll break down everything from design and display to OS 26 interface, notifications, battery, and smart applications.


📌 Jump to Sections


📺 Watch Full Video Comparison


🛍️ Buy Links

Buy HK11 Pro Max [Gen 2]:
🛍️ Buy HK11 Pro Max [Gen 2] here

Buy DATEOY WATCH 11 PRO:
🛍️ Buy DATEOY WATCH 11 PRO here


⌚ Design, Body & Accessories

Both smartwatches come in a 46mm size, making them visually similar to premium Series-style smartwatches.

The HK11 Pro Max Gen 2 features a glossy metallic frame that gives it a more premium and polished appearance. It looks extremely close to the modern flagship smartwatch aesthetic.

On the other hand, the Dateoy Watch 11 Pro uses a matte frame finish, giving it a more unique and less reflective look.

One major advantage of the Dateoy model is case compatibility. It supports standard protective cases and even includes one in the box, while the HK11’s fit is slightly loose with standard cases.

Both watches support aftermarket straps, which is excellent for customization.


🌟 Display Quality & Smoothness

Both smartwatches feature AMOLED displays, which means deep blacks, vibrant colors, and better outdoor visibility.

However, when it comes to UI smoothness and transitions, the HK11 Pro Max clearly performs better.

App opening animations, menu scrolling, and returning to the home screen all feel noticeably smoother on the HK11.

The Dateoy Watch 11 Pro has a slightly larger visible display area, but the overall responsiveness still favors the HK11.


⚡ OS 26 Interface, Watch Faces & Always-On Display

This is where the HK11 Pro Max Gen 2 takes a huge lead.

It comes with the latest OS 26-inspired interface, including:

  • Liquid glass widgets page
  • Modern control center
  • Updated icons
  • Latest sports UI
  • Latest dialer theme

Additionally, it supports the latest watch faces and offers a custom Always-On Display (AOD) that matches the active watch face.

This feature significantly improves the premium experience.

The Dateoy Watch 11 Pro still uses an older UI style and lacks the latest software visuals.

It also only allows one custom watch face at a time, which is a major limitation.


📱 Apps, Notifications, WhatsApp & Smart Features

Both watches support:

  • Bluetooth calling
  • Notification alerts
  • Emoji previews
  • Weather sync
  • Calculator
  • Calendar
  • Camera preview

The HK11 Pro Max offers a faster live camera preview with almost 1-second latency.

The Dateoy Watch 11 Pro takes around 3–4 seconds, making it noticeably slower.

However, the Dateoy model has one major advantage: dedicated WhatsApp support.

You can directly scan a QR code and use WhatsApp on the watch, which is a strong selling point.

For users who prioritize messaging, this may be an important factor.


🎥 Full Reviews

📺 HK11 Pro Max [Gen 2] Full Review
📺 Dateoy Watch 11 Pro Full Review


💾 Storage Capacity

Storage is limited on both devices compared to Android-based smartwatches.

HK11 Pro Max:

  • Global Version: ~200MB
  • Chinese Version: ~400–500MB

Dateoy Watch 11 Pro:

  • Approx. 200–300MB

Both watches allow local storage for:

  • Music files
  • Images
  • TXT documents
  • Voice recordings

If storage is your main priority, the Dateoy model may offer slightly better usable space.


🔋 Battery Life Comparison

HK11 Pro Max: 260mAh
Dateoy Watch 11 Pro: 375mAh

Despite the smaller battery, the HK11 performs surprisingly well.

With Always-On Display enabled:

  • HK11: ~1.5 days
  • Dateoy: ~1 day

With AOD turned off, both can last around 5–7 days depending on usage.


🏆 Final Verdict – Which One Should You Buy?

If you want the best premium smartwatch alternative with the latest interface, smoother UI, better animations, latest watch faces, and custom AOD, then the HK11 Pro Max Gen 2 is the clear winner.

Choose the Dateoy Watch 11 Pro only if you specifically need:

  • WhatsApp support
  • case compatibility
  • slightly better storage

For most users, the HK11 Pro Max Gen 2 offers the better overall experience in 2026.


Which one would you choose? Let us know in the comments below.

HK11 Ultra 3 Gen 2 vs HK11 Pro Max Gen 2 ⚡ Which One Should You Buy in 2026?

If you're planning to buy the latest premium Apple Watch alternative in 2026,

this comparison between the HK11 Ultra 3 Gen 2 and HK11 Pro Max Gen 2 will help you make the right decision.

Both smartwatches come with the latest OS 26 interface, AMOLED display, always-on display support, network sharing, local storage, and premium design. But the real question is: which one is actually better for your needs?

After detailed testing, here’s the complete comparison.


📌 Jump to Sections


📺 Watch Video Comparison


⌚ Design & Build Quality

The main difference between both smartwatches is the body style and overall look.

HK11 Ultra 3 Gen 2

  • 49mm rugged body
  • Matte metal finish
  • More durable construction
  • Better case compatibility
  • Ideal for sporty users

HK11 Pro Max Gen 2

  • 46mm sleek design
  • Glossy premium frame
  • More elegant and stylish look
  • Better for slim wrists

If you prefer a premium stylish look, the HK11 Pro Max Gen 2 is the better choice.

If you want a more durable and rugged smartwatch, the Ultra 3 Gen 2 wins.


🖥️ Display, Bezel & OS 26 Interface

Both models feature a smooth AMOLED display with 60Hz refresh rate.

  • Excellent touch response
  • Bright colors
  • Smooth transitions
  • Beautiful animations

Interestingly, both use a similar display panel size.

However, because the Ultra model uses a larger 49mm body, the bezels appear slightly thicker, making the display look a bit smaller compared to the Pro Max.

In regular use, this difference is barely noticeable.

Both smartwatches come with the latest OS 26 liquid glass style interface.

  • New widgets page
  • Updated control center
  • Vertical app menu
  • Improved sports mode UI
  • New call interface

🎨 Watch Faces & Always-On Display

The Ultra version offers more built-in watch faces.

  • Ultra 3: 8 built-in watch faces
  • Pro Max: 3 built-in OS 26 watch faces

Both watches support:

  • Custom Always-On Display
  • 6 AOD styles
  • Dial market downloads
  • Third-party watch faces

Both use the WearFit Pro app, though it still includes multiple ads and some paid watch faces.


⚙️ Smart Features & Notifications

Both smartwatches offer almost identical smart features.

  • WhatsApp notifications
  • Emoji support
  • Voice reply
  • Call alerts
  • AI assistant
  • Translator
  • Game market
  • App market

Unfortunately, there is still no keyboard reply support.

Both also support network sharing using your phone’s internet connection.


💾 Local Storage Capacity

Both models come with internal storage.

  • Global version: approx 200MB
  • Chinese version: approx 400–500MB

This allows storage for:

  • 10–15 songs (global)
  • 30–35 songs (Chinese)
  • 6 photos
  • TXT ebooks
  • Voice recordings

🛠️ Utility Apps

  • Weather
  • Alarm
  • Calendar
  • Calculator
  • Stopwatch
  • Timer

Both watches perform similarly here.


🔋 Battery Life Comparison

Both smartwatches feature a 260mAh battery.

  • AOD ON: around 1.5 days
  • AOD OFF: 5–7 days

Battery life is nearly identical on both devices.


📺 Full Reviews

📺 HK11 Ultra 3 Gen 2 Full Review

📺 HK11 Pro Max [Gen 2] Full Review


🛍️ Buy Now (Affiliate Links)

🛍️ Buy HK11 Pro Max [Gen 2]

🛍️ Buy HK11 Ultra 3 Gen 2 (Dateoy)

🛍️ Buy HK11 Ultra 3 Gen 2 (Vwar)


🏆 Final Verdict: Which One Should You Buy?

Buy HK11 Pro Max Gen 2 if:

  • You want a sleek premium look
  • You have slim wrists
  • You prefer glossy finish

Buy HK11 Ultra 3 Gen 2 if:

  • You want a rugged sporty watch
  • You need better durability
  • You want case compatibility

In terms of features, both smartwatches are almost identical. Your final decision should mainly depend on design preference and wrist size.

HK11 Pro Max Gen 2 vs H26 Pro Plus – Which Smartwatch Should You Buy in 2026?

If you are planning to buy a premium Series-style smartwatch alternative,

two of the most talked-about options right now are the HK11 Pro Max Gen 2 and the H26 Pro Plus.

Both models come with the latest OS26-inspired interface, AMOLED displays, Bluetooth calling, Always-On Display support, and a premium 46mm design.

But which one is actually better for daily use?

In this detailed comparison, we’ll compare everything from design and display smoothness to software, battery, storage, and overall value.


Quick Navigation


Watch Full Video Comparison


Design & Build Quality

Both watches come in a 46mm size with glossy metallic frames that give them a premium look.

However, in terms of overall body quality, the H26 Pro Plus takes the lead.

  • Better case fit
  • Compatible with Series 11 protective cases
  • Slightly larger body and screen
  • Premium overall finish

The HK11 looks excellent, but third-party protective cases may fit loosely.

Both support aftermarket straps perfectly.


Display & Smoothness Comparison

Both smartwatches feature AMOLED displays with excellent color reproduction and deep blacks.

That said, the HK11 Pro Max Gen 2 clearly wins in smoothness.

Animations, transitions, menu scrolling, and watch face responsiveness feel noticeably smoother compared to the H26 Pro Plus.

The H26 display is not bad, but side-by-side the HK11 feels much more polished.


OS26 Interface, Watch Faces & Always-On Display

Both models come with the latest OS26 liquid glass style UI.

However, the interface implementation is noticeably better on the HK11.

HK11 Strengths

  • Smoother transitions
  • Better icon design
  • Improved sports app interface
  • More natural liquid glass UI

H26 Strengths

  • Custom AOD for all watch faces
  • Dial market faces also support AOD
  • Display can stay on all day

This is where the H26 really shines.

Unlike HK11, where custom AOD is mainly limited to built-in faces, the H26 supports it across almost all installed watch faces.


Watch Face Market & Companion App

The HK11 uses WFit Pro, which unfortunately still contains ads and many paid watch faces.

This can negatively affect user experience.

Meanwhile, the H26 uses Leier Pro, which offers:

  • Cleaner UI
  • Faster sync
  • Free watch faces
  • Better dial customization

For app experience alone, the H26 is easier to recommend.


Apps, Notifications & Smart Features

Both devices offer useful smart features such as:

  • Bluetooth calling
  • Weather sync
  • Alarms
  • Timer
  • Voice recording
  • TXT ebook support

The HK11 adds some extra convenience with:

  • Live camera preview
  • Faster photo shutter control
  • Game market

The H26 offers better utility behavior, such as a stopwatch that can continue in the background.


Storage Capacity

Both brands advertise more storage than what is practically usable.

HK11 Pro Max:

  • Global: ~200MB usable
  • China variant: ~400–500MB usable

H26 Pro Plus:

  • Very limited music storage
  • Better for images + TXT files

If local music playback matters to you, HK11 performs better.


Battery Life

HK11: 260mAh

H26: 300mAh

Real-world usage:

  • AOD ON: ~1.5 days on both
  • AOD OFF: HK11 = 5–7 days
  • AOD OFF: H26 = up to 1 week

The H26 has a slight advantage here.


Buy Links

🛍️ Buy HK11 Pro Max Gen 2:
Buy Here

🛍️ Buy H26 Pro Plus:
AliExpress
VWAR Store
Dateoy Store


Related Full Reviews

📺 HK11 Pro Max Gen 2 Full Review

📺 H26 Pro Plus Full Review


Final Verdict – Which One Should You Buy?

Choose HK11 Pro Max Gen 2 if you want:

  • smoother UI
  • better animations
  • better display clarity
  • better local music support

Choose H26 Pro Plus if you want:

  • better body quality
  • case compatibility
  • better AOD implementation
  • better app ecosystem
  • slightly better battery

For pure UI experience, HK11 wins.

For practical daily usage and better polish, H26 Pro Plus is an excellent choice.

HK11 Pro Max Gen 2 vs Gen 1 Full Comparison – Is the Upgrade Really Worth It?

If you are confused between the HK11 Pro Max Gen 2 and the older Gen 1 model,

this detailed comparison will help you decide whether the upgrade is actually worth your money.

Both smartwatches are among the most popular Series-style smartwatch alternatives currently available, offering premium looks, AMOLED displays, Bluetooth calling, health features, and an Apple-inspired interface.

But the big question is: Should existing Gen 1 users upgrade to Gen 2?


Quick Navigation


Watch Full Video Comparison


Design & Build Quality

Starting with the design, both the HK11 Pro Max Gen 1 and Gen 2 come in a 46mm size with a glossy premium frame finish.

At first glance, both watches look nearly identical and maintain the same premium aesthetic that makes them popular among smartwatch buyers.

One thing to note is that Series 11 protective cases do not fit properly on either model, which may disappoint users looking for third-party case compatibility.

However, the good news is that straps are fully compatible across both generations, and aftermarket straps work perfectly.

Interestingly, the strap grip on the Gen 2 feels tighter and more secure compared to the older model.


AMOLED Display Comparison

Both smartwatches feature a 60Hz AMOLED display, delivering excellent smoothness and vibrant visuals.

Based on real-world use, both displays appear to be using the same panel size and same bezel dimensions.

This means users upgrading from Gen 1 should not expect any improvement in:

  • Screen size
  • Refresh rate
  • Brightness
  • Bezel thickness

The display quality remains excellent on both devices.


OS26 Interface & Software Upgrades

This is where the Gen 2 model truly stands out.

The HK11 Pro Max Gen 2 introduces the latest OS26-inspired interface featuring:

  • Liquid glass style control center
  • Updated widgets page
  • Refreshed app icons
  • Improved sports mode UI
  • Modern menu design

The interface feels significantly more polished and modern compared to Gen 1.

Always-On Display Improvements

One of the biggest upgrades is the custom Always-On Display support for built-in watch faces.

This feature is missing on Gen 1, making Gen 2 much better for users who rely on AOD functionality.

However, maximum screen timeout remains limited to 30 seconds on both watches.


Notifications & Smart Features

Both devices support:

  • Notification banners
  • WhatsApp message replies
  • Voice assistant replies
  • Emoji responses
  • Scrolling notifications

This means there is no major difference in notification handling.


Storage, Music & Media

Both global variants offer around 200MB real usable storage, despite being marketed as 1GB.

In practical use, this allows:

  • 10–15 songs
  • 6 pictures
  • Multiple TXT ebooks
  • Voice recordings

Storage capacity remains nearly the same between both generations.


App Experience

Both watches still use the same companion application, which unfortunately continues to show ads and premium watch face restrictions.

This remains one of the weaker points of both devices.


Battery Life

Both models feature a 260mAh battery.

Real-world battery performance:

  • 1.5 days with AOD ON
  • 5–7 days with AOD OFF

Battery life is essentially identical.


Final Verdict – Should You Upgrade?

If you do not already own the Gen 1, then the HK11 Pro Max Gen 2 is definitely the better choice.

The improved interface, modern icons, better AOD support, and refined UI make it the superior option for new buyers.

Buy HK11 Pro Max Gen 2 here:
Buy HK11 Pro Max Gen 2

However, if you already own the Gen 1, the upgrade is not substantial enough.

Unless the new OS26 design and improved AOD matter a lot to you, it may be better to wait for the next generation.


Conclusion

Overall, the HK11 Pro Max Gen 2 is a refined upgrade rather than a revolutionary one.

For new buyers, it is the best version to choose. For existing users, waiting for a future model may be the smarter decision.

Translate

Google Search Console

You may also like:

How to Improve iPhone Battery Life on iOS 27 Without Losing Performance

Is your iPhone battery draining faster than expected after updating to iOS 27? You do not necessarily need to sacrifice smooth animatio...

Popular Posts